Who's Afraid of Wet-Folding?
Wet-folding is a technique introduced to the world by Japanese origami master Akira Yoshizawa, involving the dampening of thick papers in order to make them more foldable and create sturdier models.
Why wet-fold?
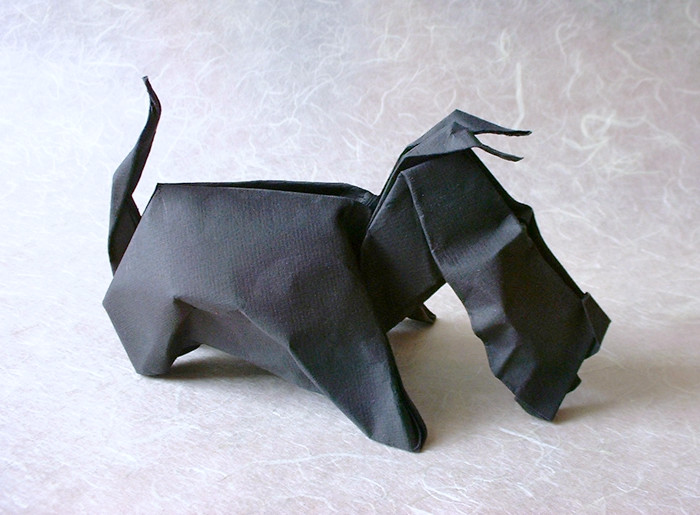
Wet-folding can make the difference between a model that looks like this:

and a model that looks like this:

Both are the same model: Puppy by Francisco Javier Caboblanco (see Jo Nakashima's video).
Origami paper is thin and crisp, and quite hard to shape to will. Also, it tends to splay and lose its shape over time. Heavier paper, however, after being dampened, can be more easily shaped to create beautiful three-dimensional models, which, when dry, will hold their shape for years.
What models can I wet-fold?
The best models for wet-folding are the simplest. Because we're using thick paper as it is, we don't want to get too many layers in the folds.
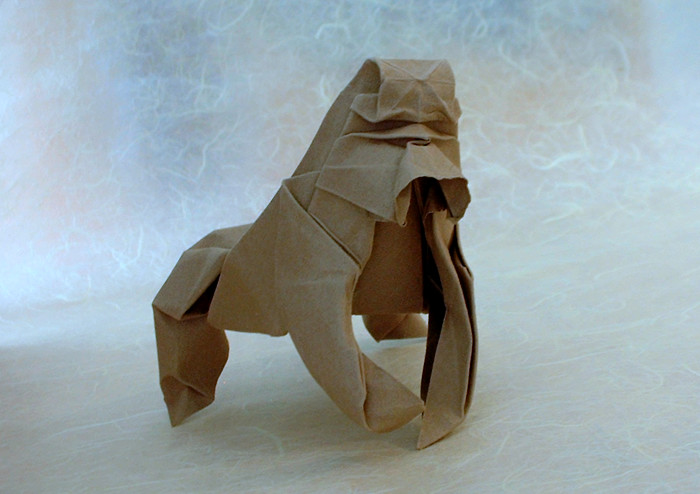
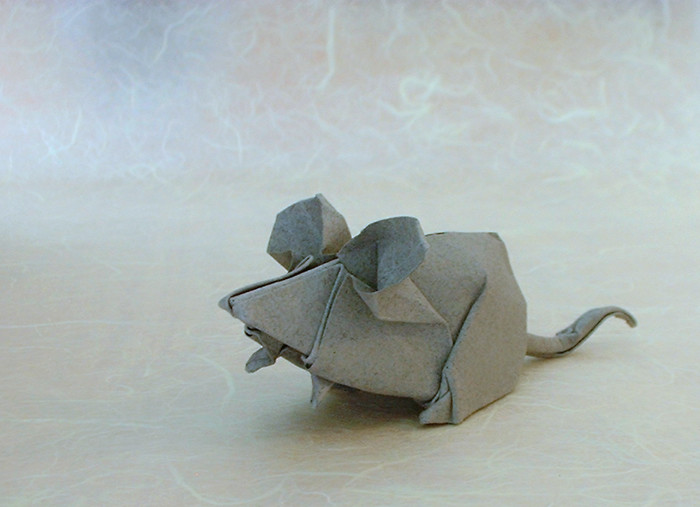
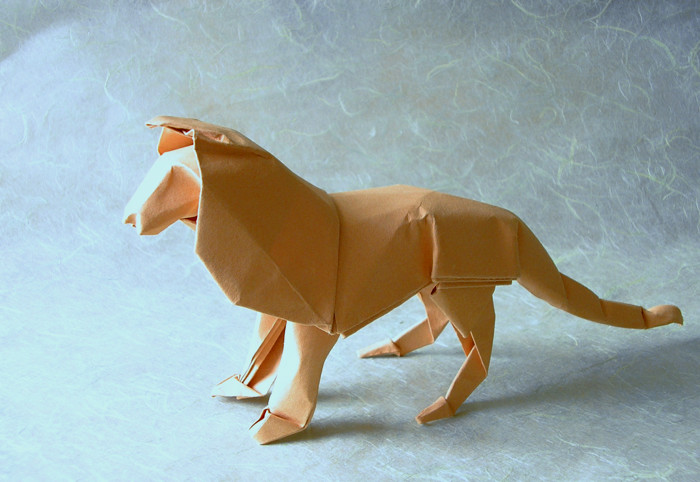
Obviously, wet-folding lends itself best to folding animal models, since there are many curves and details to be put in them:
What tools do I need?
Not many tools required. A small spray-bottle with water will supply the liquid, a cloth (or even a paper towel) will help spread the water evenly, and a nice sheet of wet-folding paper.
What is the best paper for wet-folding?
There are many brands of thick art-paper out there. Try your local art-store and see what they have. I prefer using Double-sided mulberry paper, or Fabriano and Canson brands, with weights from 90 to 160gsm. The simpler the model, the heavier the paper! Another favorite is Elephant-Hide paper (also known as Wyndstone Marble). The best way to find the right paper for you is to just try out various paper types.
Preparation
Because wet paper changes its proportions slightly, due to the expansion of fibers, it's best to dampen the whole sheet before cutting the square out of it.
Let's get wet!
The technique is called "wet-folding", yet you don't want to wet the paper, but rather to only moisten it. Spray the sheet with a fine mist from about 30cm away, wipe the paper with the cloth to spread moisture evenly, and quickly repeat on the other side of the sheet, before it curls. The paper should not be wet! It should only be slightly damp, not shiny with water. You should feel how it gives less resistant to manipulation, a little like a piece of leather. Now cut your square.
The Folding
Fold the model as you usually do, but with one exception. In regular folding, you may be used to putting creases in using your fingernails:


In wet-folding, don't put such strong creases. Use the pads of your fingers instead.
After the first few folds, try making most folding "in the air", not using a table.
If you feel the paper starting to get dry and stiffen while folding, use the cloth or spray-bottle to add some moisture, but try to not over-do it. While folding, think how you want the model to look at the end. Give special consideration to the back of the animal - you don't want to put too-sharp creases there.
Finishing the model
This is where the wet-folding technique shines. After you complete the last step of the diagrammed model, the fun begins! Think about the animal you're trying to create, and mold the paper to give it 3-dimensional curves, create a facial expression, curl the tail and add the fine little details that make all the difference. Again, if the paper gets dry, moisten it.


Sometimes, if there are too many layers inside the model, it will begin to splay before it dries. To prevent this, use clothes pegs, binder-clips or a rubber-band to keep the model in the shape you desire while it dries, and maybe even give the whole model another spray. After a few hours, you can take the enforcement off, and the model will hold its shape for good.


Wet-folding practice suggestion
An excellent model for wet-folding is David Derudas' Ranoshi (video instructions on YouTube).
So now, go ahead and do some wet-folding!
